Reacting to Revolutionary Russia: An Educational Video Game
Creating Art Assets
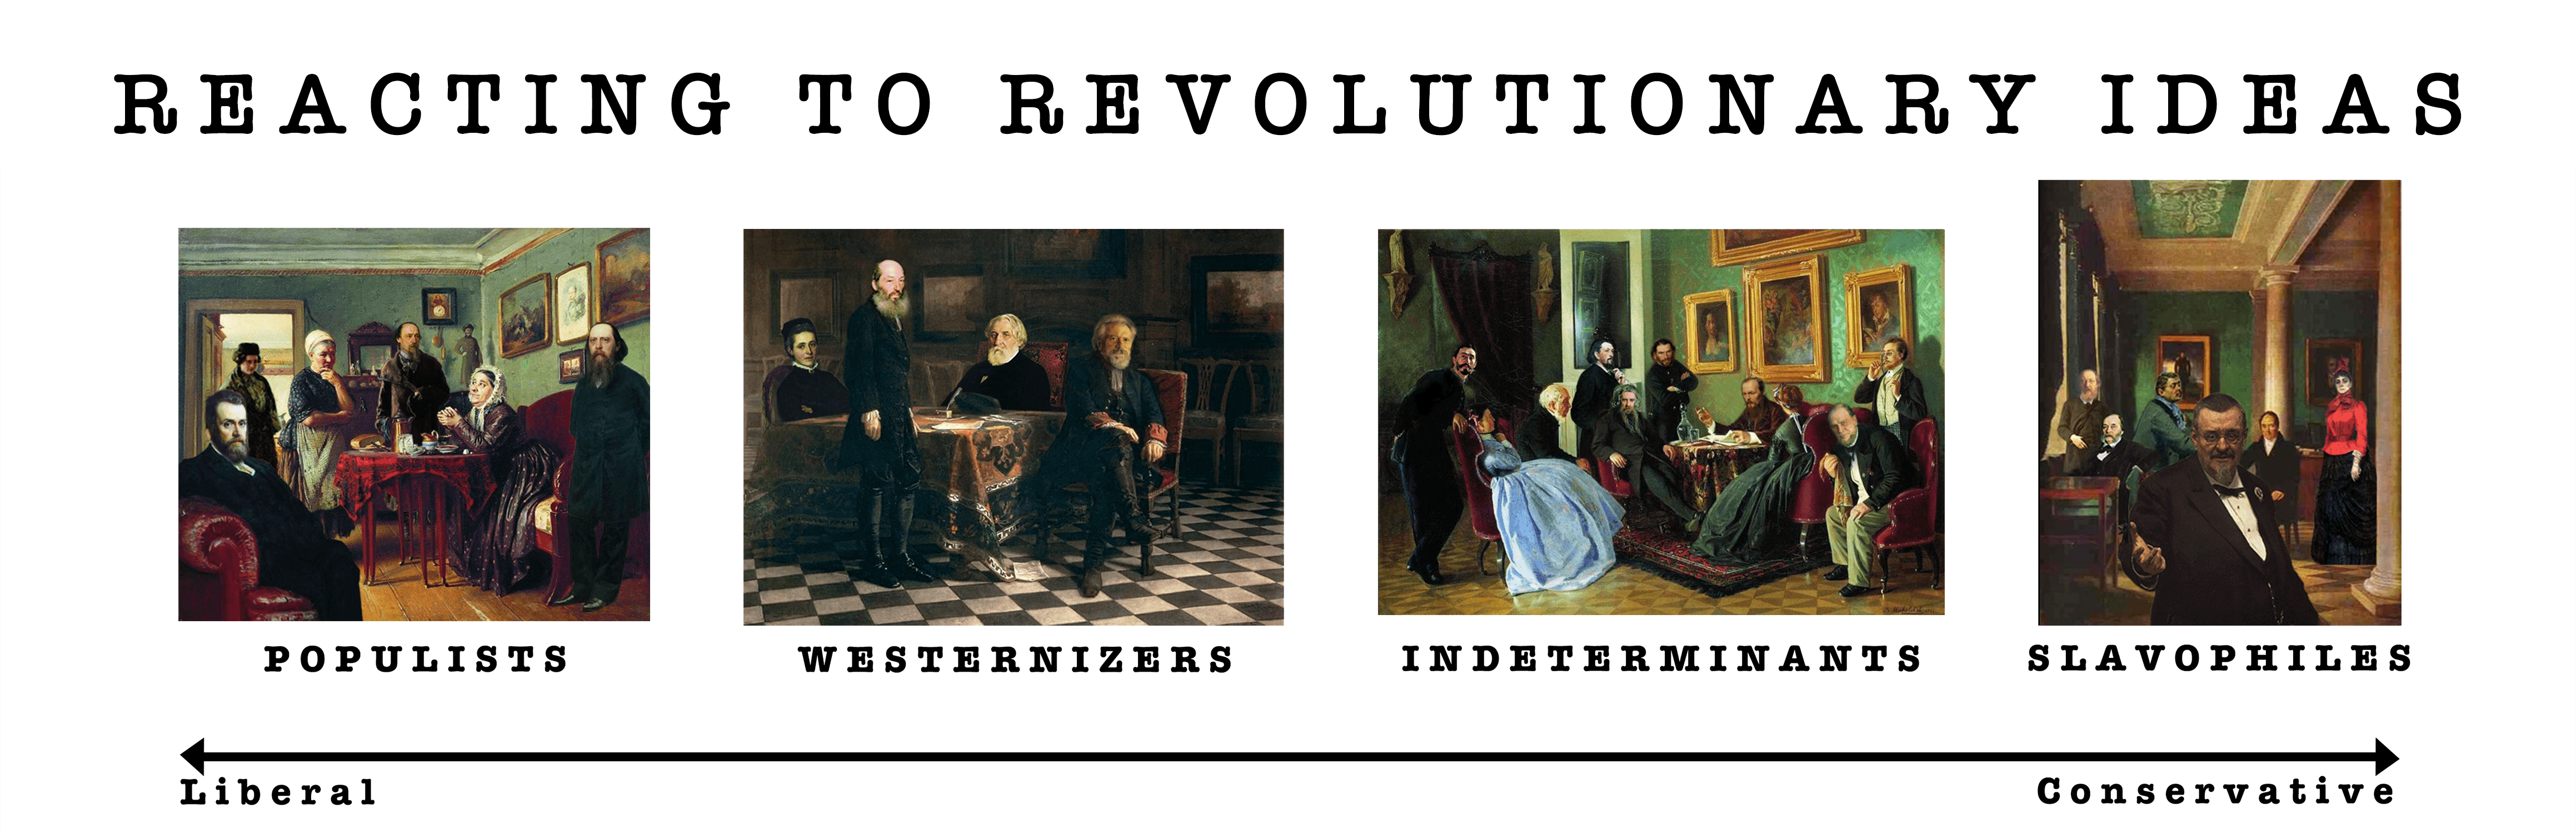
The Goal
This week I am working on the game's art. The process of cutting out figures from paintings in Photoshop is a fairly long and tedious one, but it will be well worth the effort.
I downloaded a bunch of Repin's paintings and portraits from WikiArt. All of the art is in the Creative Commons, so I can use it in the game without paying any money or even making a citation, and I can manipulate the images to suit my needs.
I plan to make a series of 4 scenes like the one below.
I'll cut out the portraits of each of the NPCs' real-life counterparts, attach their head to a more complete body cut from one of Repin's scenes, and place these new NPC sprites into a new scene. The reason I am making 4 scenes is so that each of the 3 factions and the group of indeterminates can be visually connected, allowing the player to quickly learn to associate NPCs with their political ideology.
Staying Organized
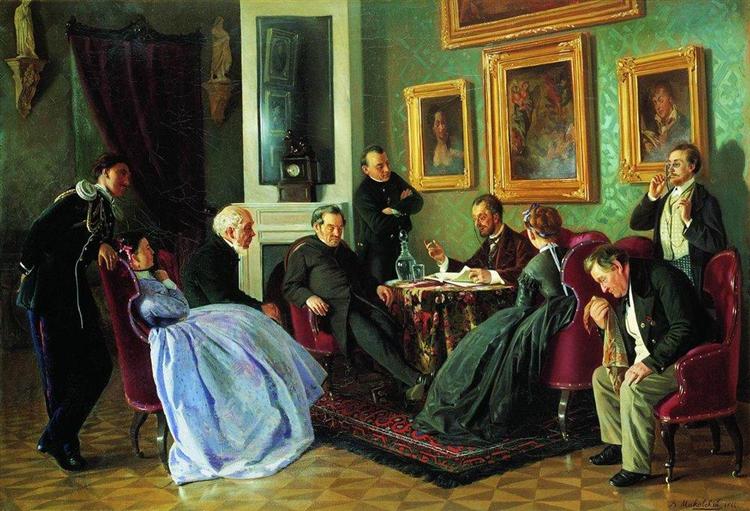
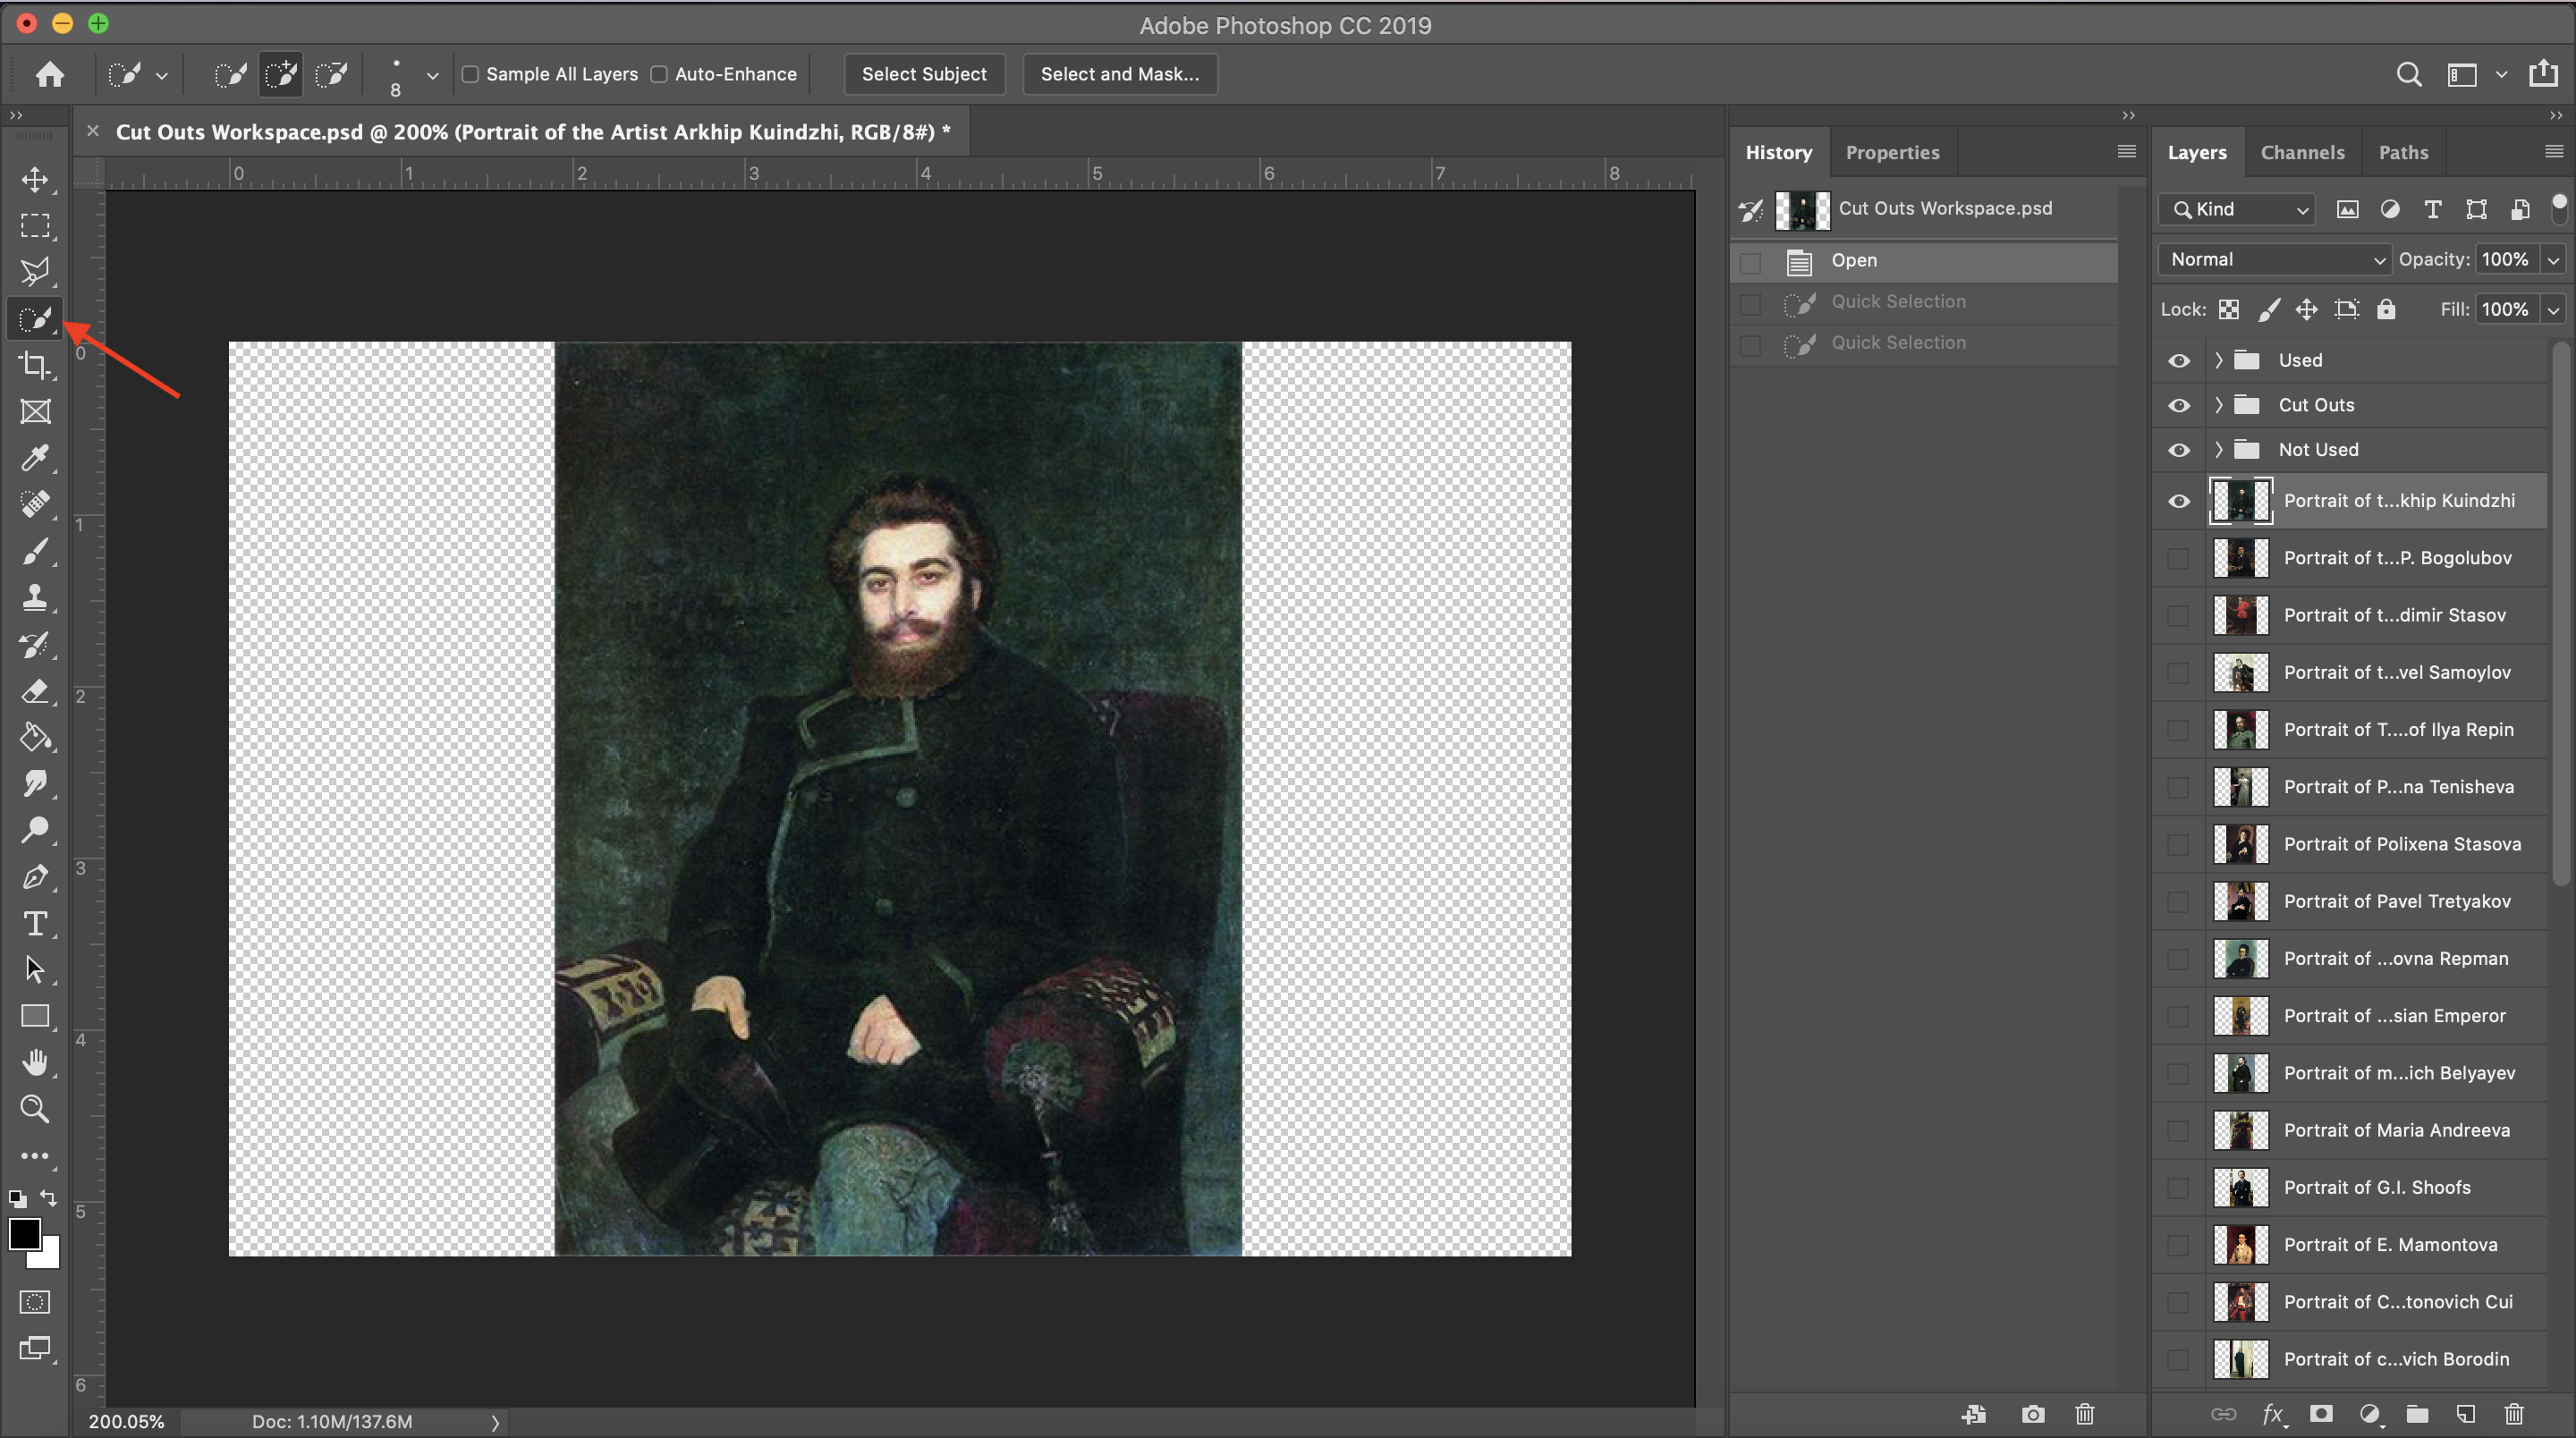
The first step in making my scenes was cutting out figures from Repin's art. I opened the image above in Photoshop so as to set the common dimensions for all of my future sprites. Then I opened a whole bunch of Repin's portraits and scenes with each having their own layer. I started from the top of the Layers Panel and worked my way down until I had gotten through all the images.
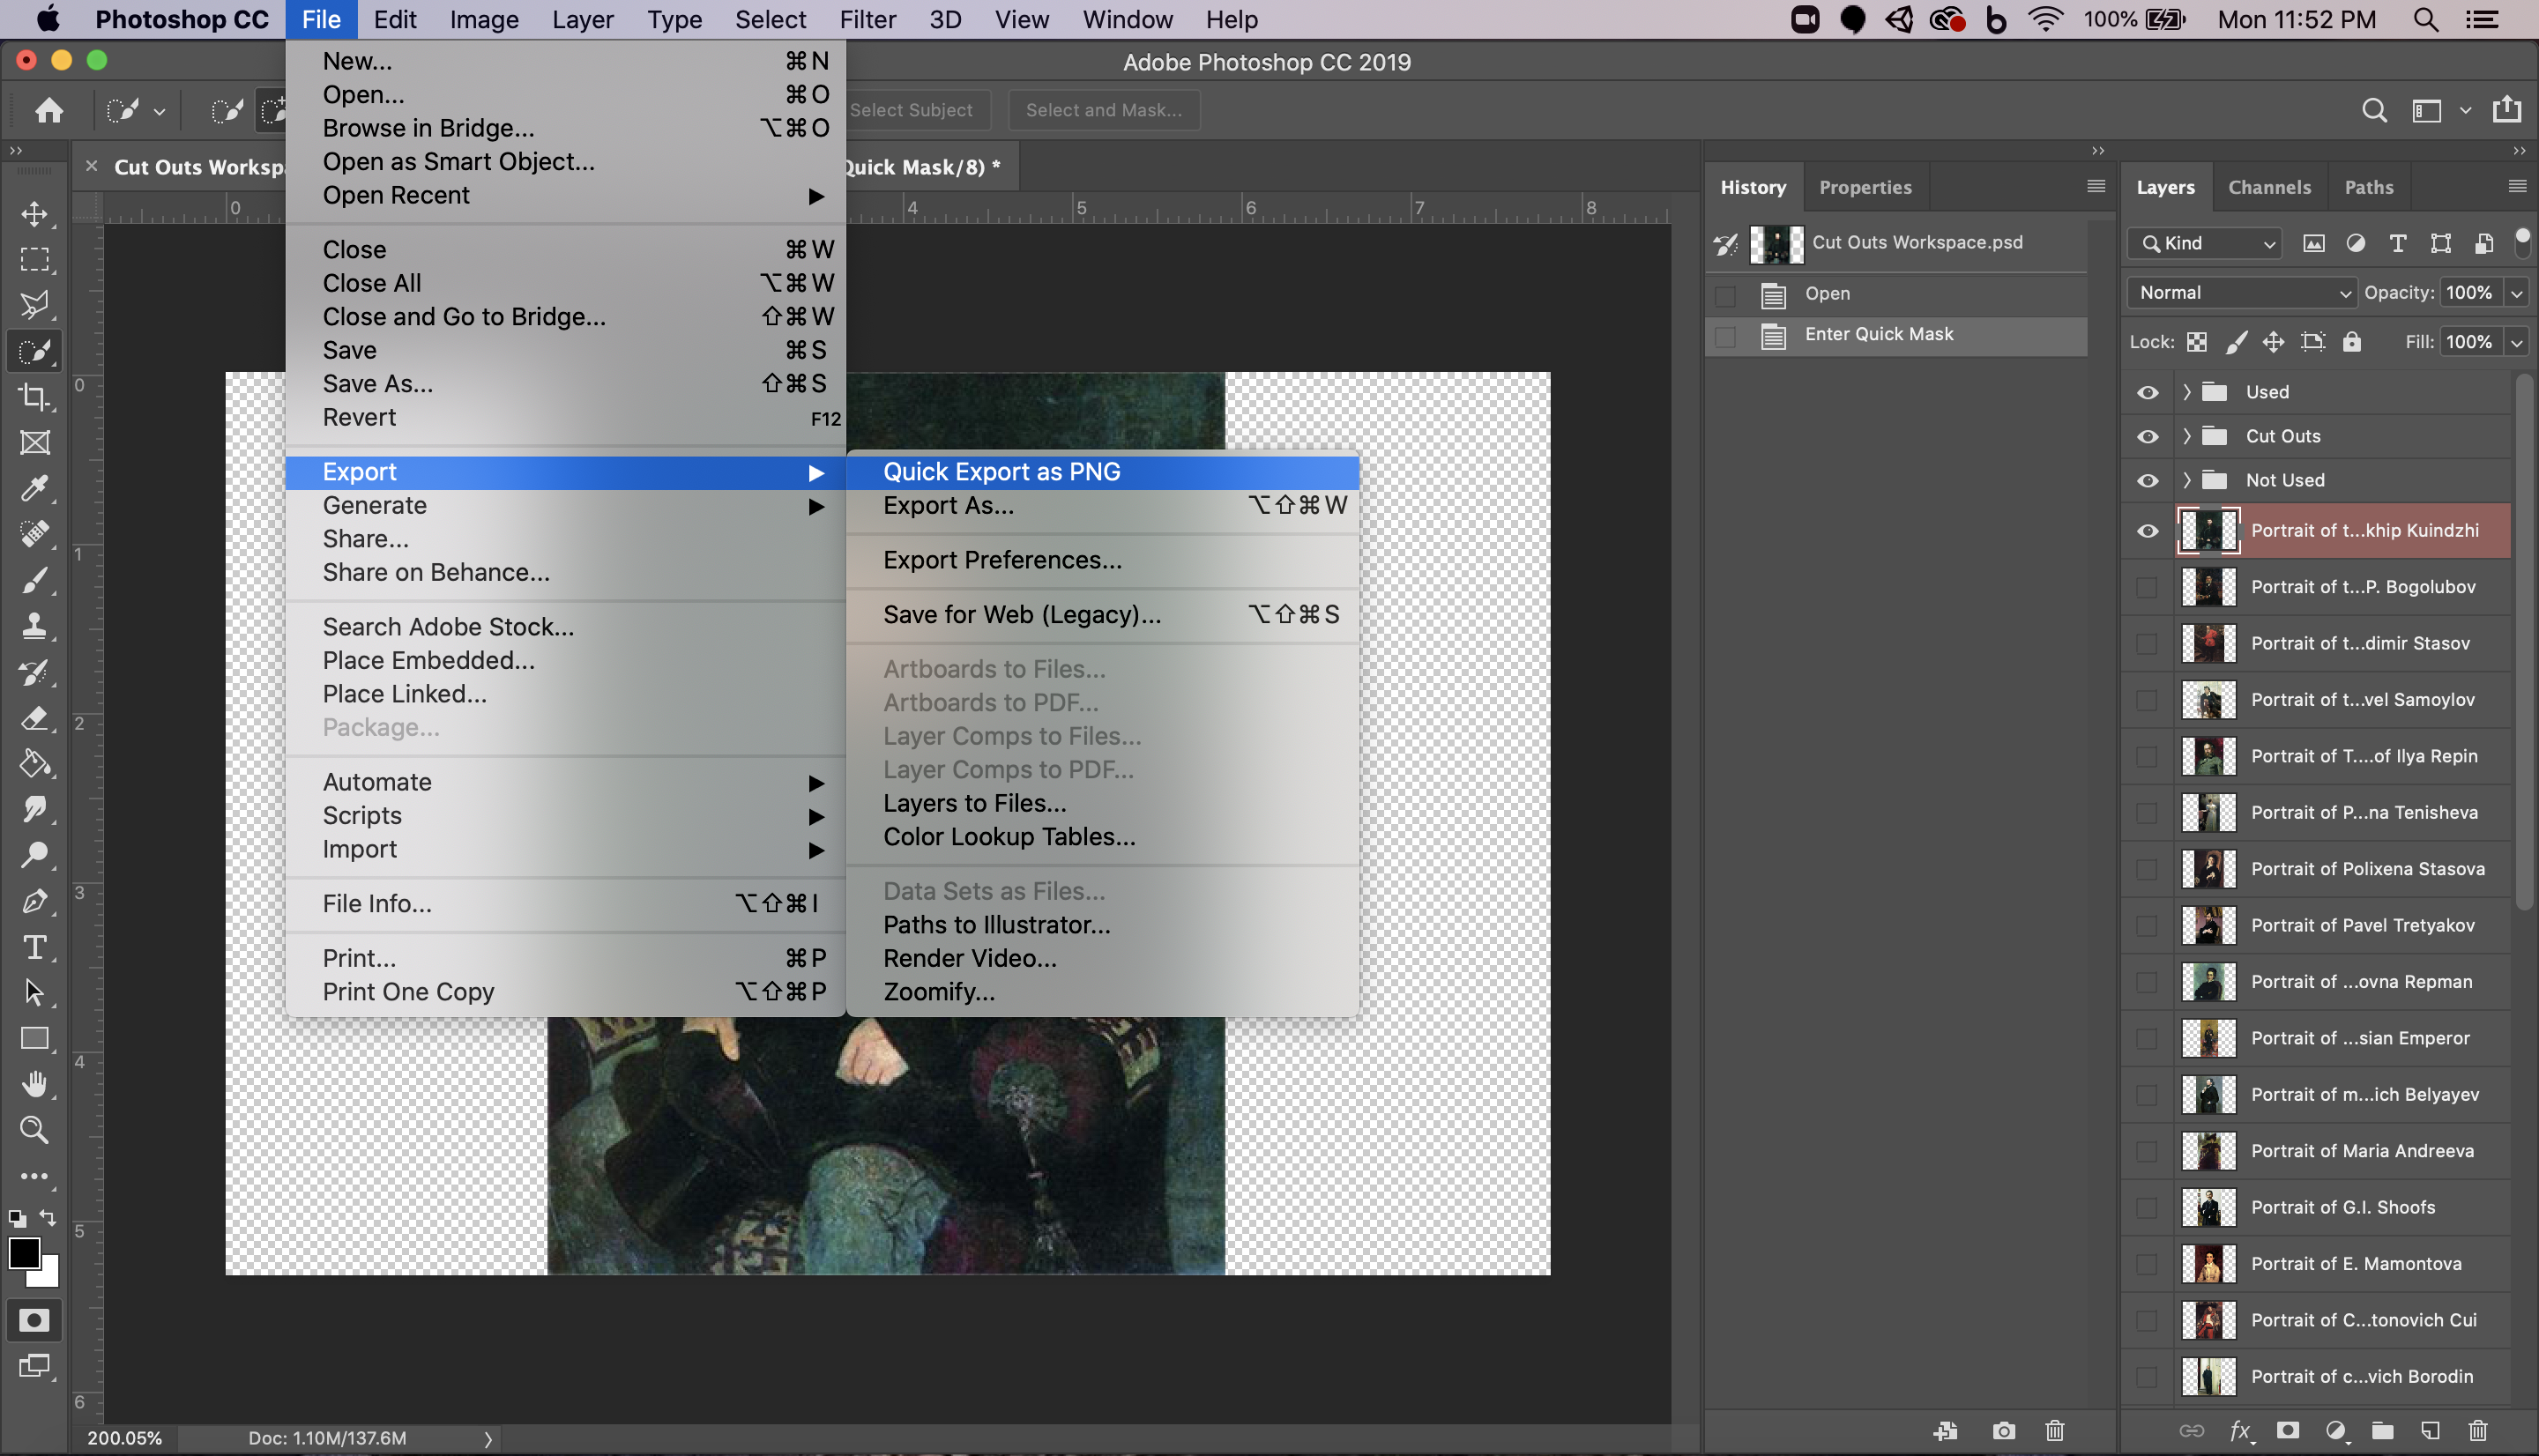
Rather than cutting out the figure(s) I wanted straight from their original painting, I used "Command+J" to copy them onto a new layer. That way I preserved all of the information in the layer I started with. Every time I finished my work on one painting, I would export each newly created figure as a .png file, then I'd move its layer to the "Cut Outs" folder in case I wanted to work on it again. I moved the original layer with the full painting into the "Used" folder. If I didn't extract any images from the painting and wanted to move onto the next one, I moved that layer to the "Not Used" folder in case I wanted to come back to it.
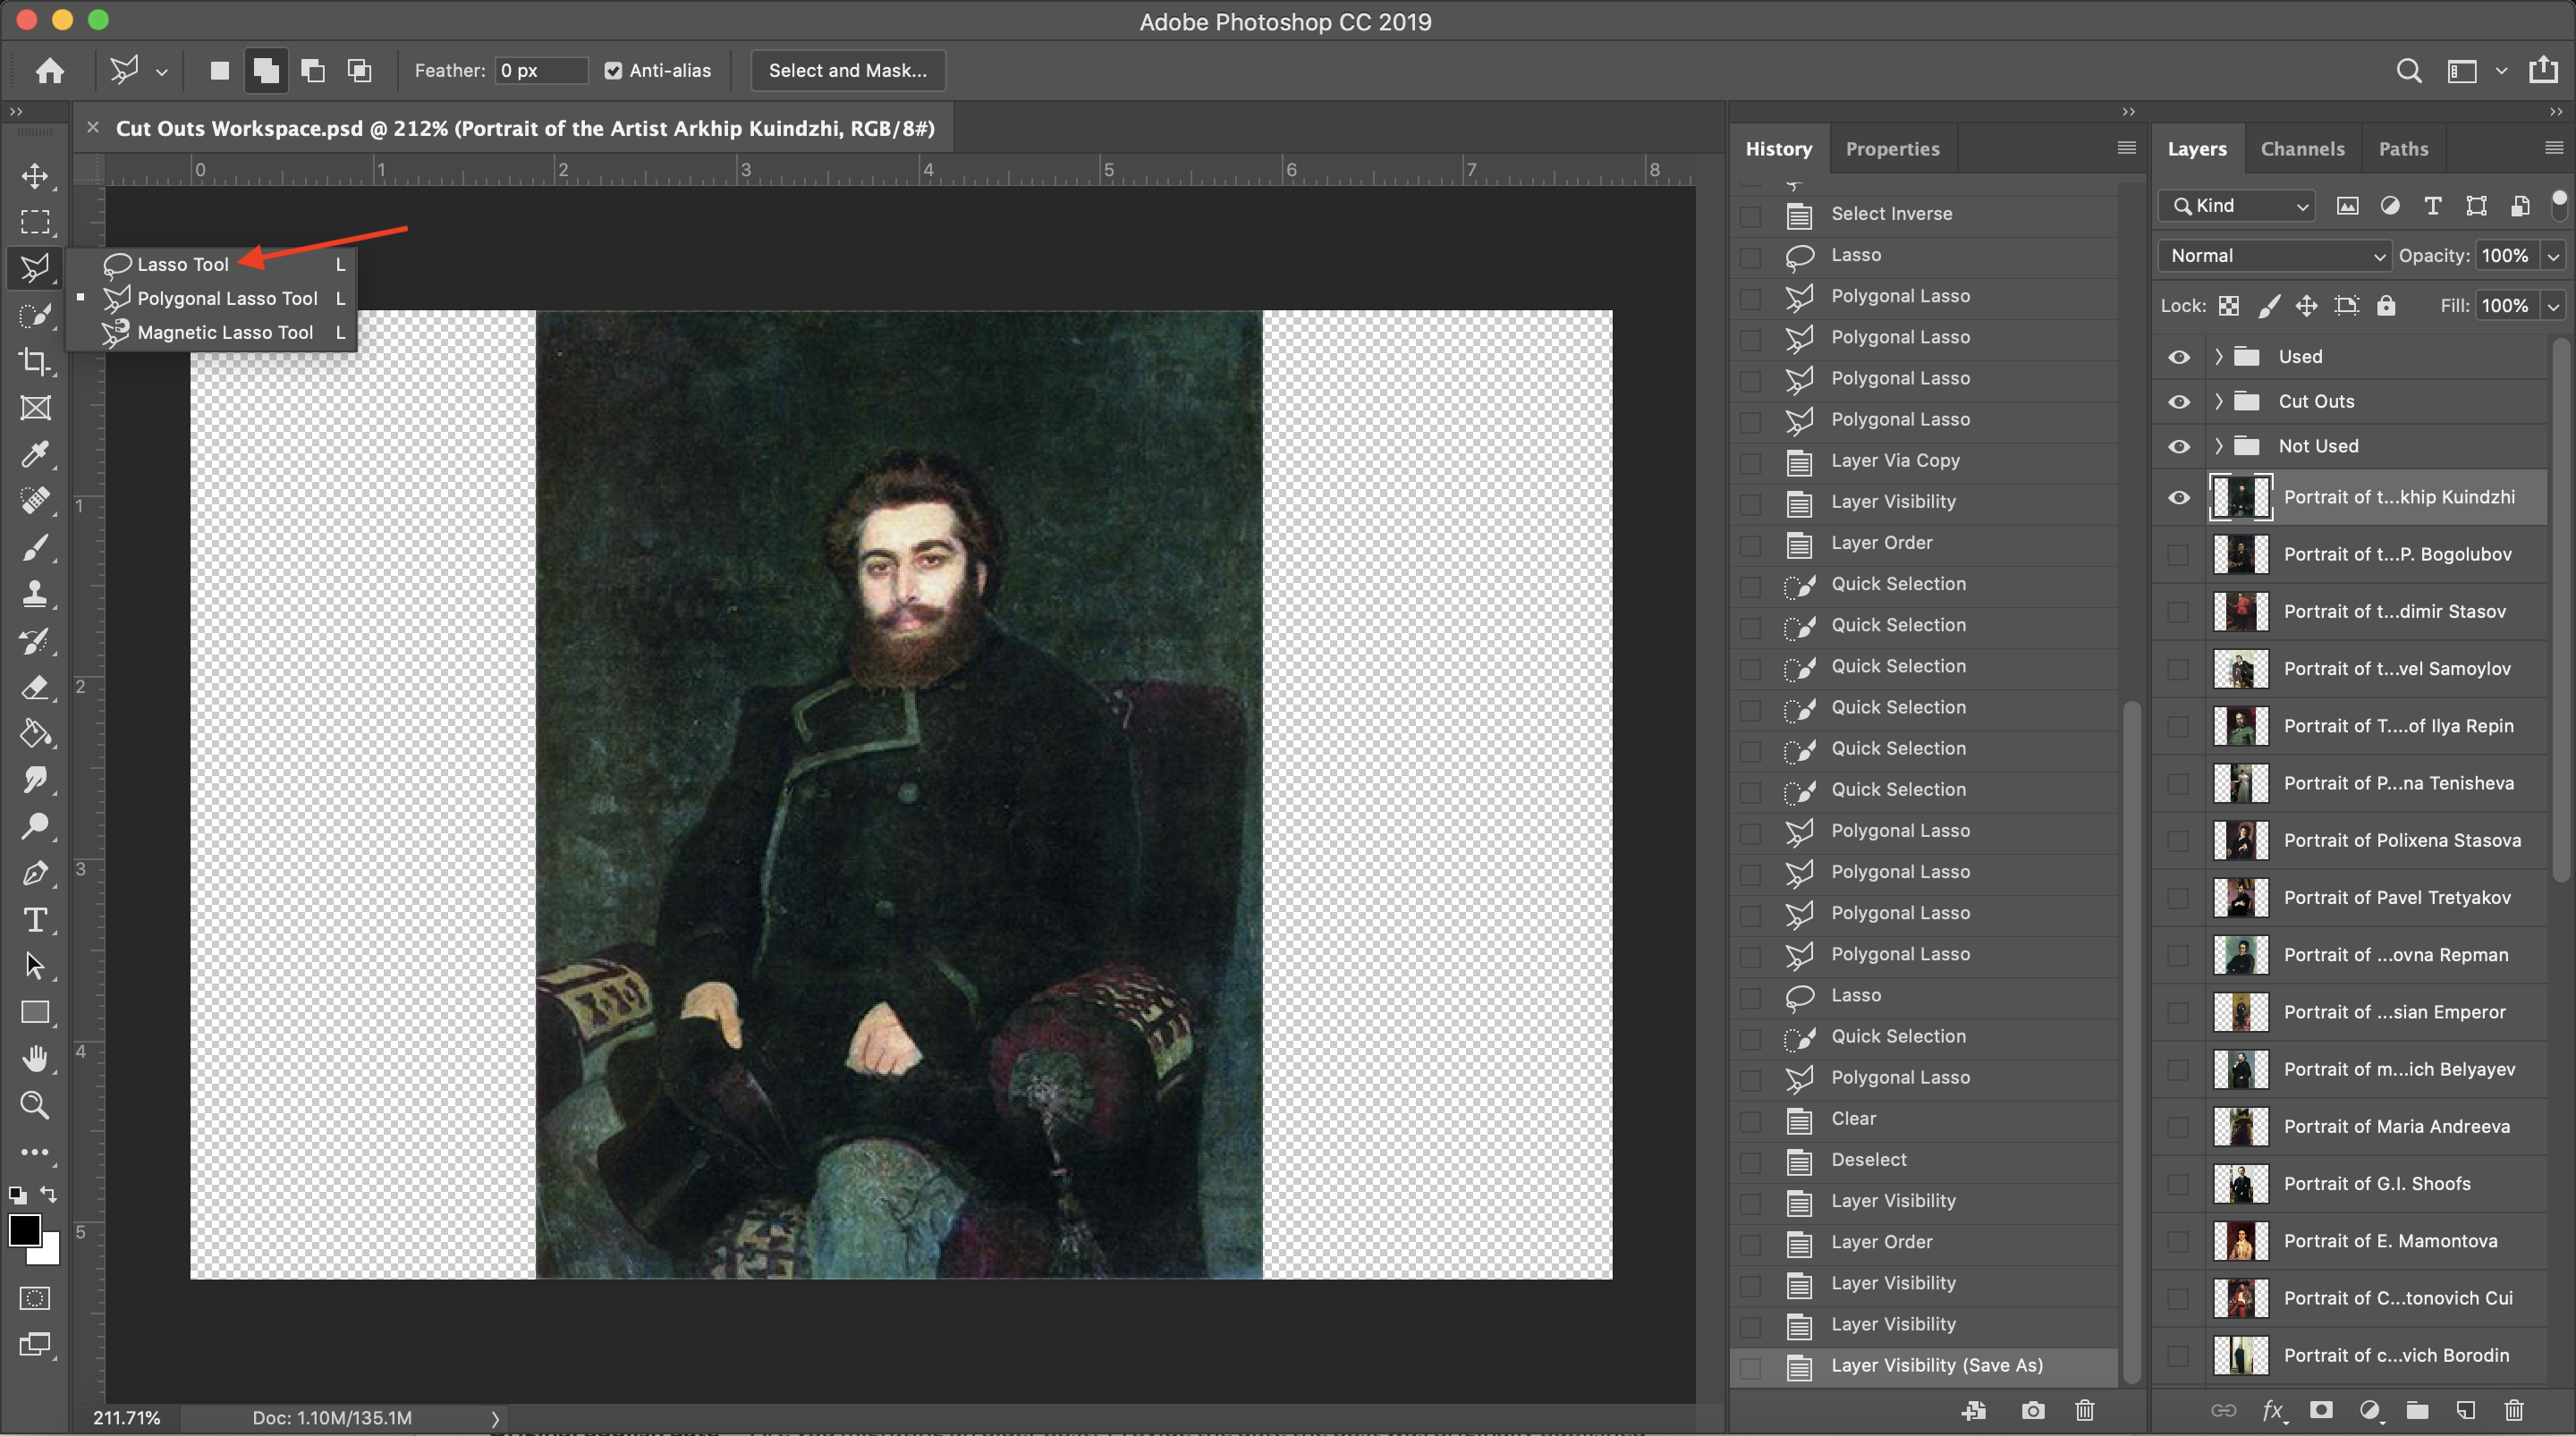
Quick Selection Tool
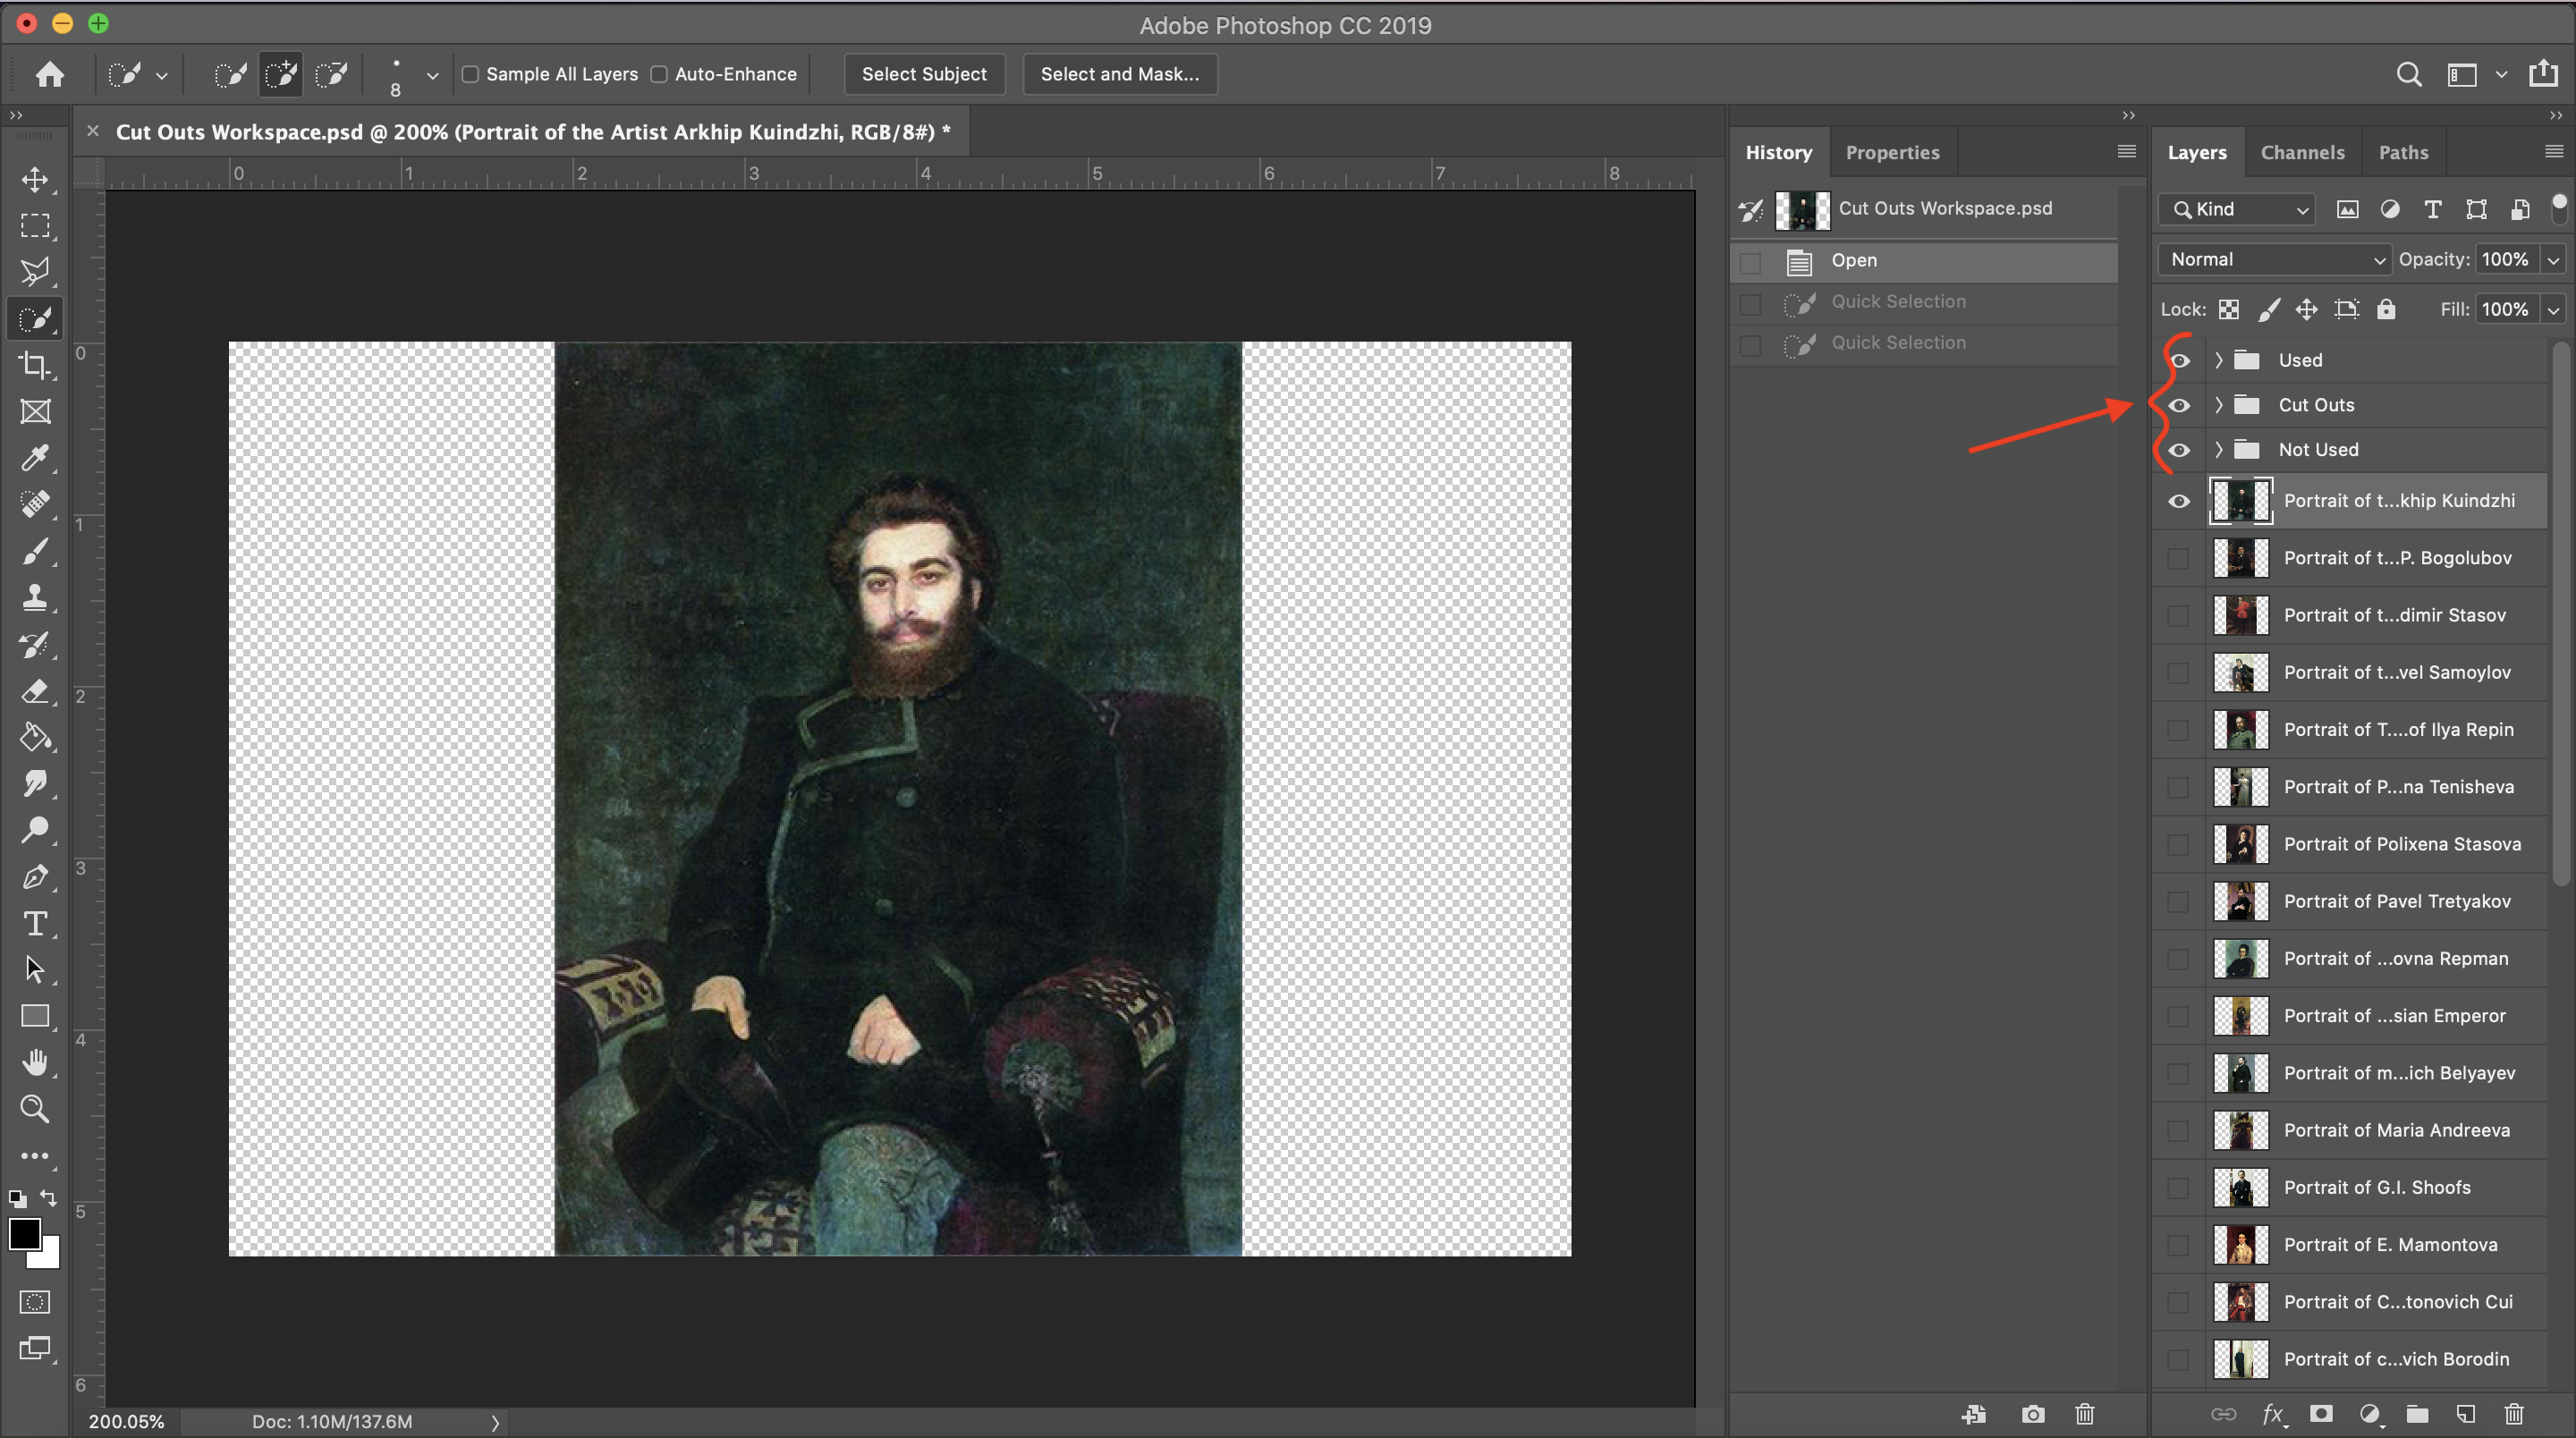
The quick selection tool automatically identifies shapes in images, so it was a good starting place for each selection. However, this tool works best when there is good contrast between the part of the image you want to select and the background. The portrait below has very little contrast between the man's hair, clothes, and the background, so the quick selection tool tried to treat them all as the same. Even on paintings with better contrast, the quick selection tool was imperfect, so I had to clean up my selection with additional tools.
Lasso Tool vs. Polygon Lasso Tool
I used the lasso tools to add or subtract from my initial selection. Both of them are more precise than the quick selection tool because you have complete control over what you select. The lasso tool is better for rounded selections, especially if they are small. The downside is you have to use your mouse to draw the precise shape you want, which can lead to shaky selections if you try to do too much. The polygonal lasso tool is better for straight-lined selections or larger ones because you continuously click across the image to draw your polygon by picking its vertices. It is more precise, but more tedious. I used both in conjunction with the quick selection tool to isolate the Repin figures. The magnetic lasso tool tries to determine the edge of your selection for you as you guide it, which makes it more tedious than the quick selection tool and less precise than either of the other lassos, so I generally avoid it.
Exporting
When I was happy with my selection, I pressed "Command+J" to put it on its own layer. Then I quick exported it as a .png file. I named each one according to the file naming convention I had determined to keep my sprites organized.
Leave a comment
Log in with itch.io to leave a comment.